Leaderboard


Popular Content
Showing content with the highest reputation since 07/17/2013 in all areas
-
JavaScript Tips: Caspio Form Elements JavaScript is a client-side scripting language that is commonly used in HTML pages. JavaScript can be used in Caspio Bridge DataPages to extend capabilities outside the standard features. This page provides a guideline for referencing Caspio form elements using JavaScript. It is an advanced topic and you should have prior knowledge of JavaScript programming. Referencing Caspio Form Elements A common way to access a form element using JavaScript is by referencing the element's ID attribute using: - document.getElementById("id") The value in the field can be referenced using: - document.getElementById("id").value In the following sections, we will list the ID attributes for Caspio form elements in various DataPages. Submission Forms Text Field/Text Area/Dropdown/Checkbox/Listbox/Hidden: - InsertRecordFIELDNAME - FIELDNAME should be replaced with your field name. - For example: document.getElementById("InsertRecordFirst_Name") Radio Button: A radio button includes multiple options and each option has an associated ID. The ID is a name followed by a number: - InsertRecordFIELDNAMEX - X is the radio button option order, which starts at 0 and increments based on the order of each radio option. For example if your radio button has three options: Red, Blue, Green - Red is InsertRecordFIELDNAME0 - Blue is InsertRecordFIELDNAME1 - Green is InsertRecordFIELDNAME2 Virtual Field: cbParamVirtualX - X is the virtual field in the form, which starts at 1 and increments based on the number of the virtual fields in the form. - For example: document.getElementById("cbParamVirtual2") is referring to the second virtual field. Cascading Dropdown: Cascading dropdown and its parent dropdown are referenced by name since the ID changes on every page load. To reference cascading dropdown and its parent dropdown, use the following format: - document.getElementsByName("InsertRecordCompany_Name")[0] - Note that in the above format, the number 0 never changes. Display Only: These are not fields but span tags, therefore they don't have an ID. Details and Update Forms Details and Update Forms use the same rules and naming conventions as Submission Forms (in previous section), except that InsertRecord is changed to EditRecord. - EditRecordFIELDNAME - For example: document.getElementById("EditRecordFirst_Name") - Note that Virtual Fields and Display Only rules are the same as Submission Forms (in previous section). Search Forms Text Field/Text Area/Dropdown/Checkbox/Listbox/Hidden: - ValueX_Y - X is the form element order, which starts at 1 and increments based on the order of the element in the form. - Y is the criteria. It starts at 1 and increments based on the criteria order. It is always 1 if the field has no extra criteria. Radio Button: ValueX_Y[Z] - Z is the radio button option order, which starts at 0 and increments based on the order of the each radio option. Virtual Field: The rules are the same as Submission Forms (in previous section) Cascading Dropdown: This element should be referenced by name as explained in the previous section. The name of the element is ValueX_Y. Distance Search By ZIP/Postal Code: - Center of Search: cbDsField1 - Distance: cbDsField2 Distance Search By Coordinates: - Center Latitude: cbDsField1 - Center Longitude: cbDsField2 - Distance: cbDSField3 Authentication/Login Forms Text Field: xip_FIELDNAME - FIELDNAME should be replaced with your field name. Referencing Forms To access Caspio Forms/DataPages, you can reference the ID using: - document.getElementById("caspioform") Note that all Caspio DataPages share the same id as "caspioform". Therefore if there are multiple DataPages deployed on the same page, you need to reference them in a different way such as: - document.forms[X] X starts at 0 which refers to the first form on the page and increments based on the order. To access Caspio Authentication or Login Forms, use: - document.getElementById("xip_DataSourceName") - Replace "DataSourceName" with the name of data source used in your Authentication. Referencing Buttons Submit Button: Submit Update Button: Mod0EditRecord Delete Button: Mod0DeleteRecord Search Button: searchID Back Button: Mod0CancelRecord Login Button: xip_datasrc_DataSourceName - Replace "DataSourceName" with the name of data source used in your Authentication. Where to Place the JavaScripts In Forms, place your code in an HTML Block. The HTML Block should be the last element in the list. In Results, place the code in the Header or Footer unless you want the code to be executed for every record. Quick Tips If you need to reference an element that is not listed in the above document, try using F12/Developer Tools available from most browsers such as IE, Firefox, and Chrome. Developer Tools help web developers inspect the elements on the web page to find the related ID and also debug JavaScript code if necessary using the Console tab. For more information, check online for available tutorials using your browser's Developer Tools. In the meantime, you can see examples of JavaScript solutions in the community forum.15 points
-

JS: Format Phone Number
bradleyqz3 and 11 others reacted to caspio for a topic
JavaScript Solution: Format phone number Feature Description: This JavaScript solution shows how to format an entered phone number as (XXX)-XXX-XXXX in a Submission Form. Implementation: This solution can be used "as-is", without any changes if a. It is used in a Submission Form DataPage. b. There is a text field in the table called "Phone". To use this solution copy and paste the code below, inside the HTML Footer section of the Form using the Caspio Bridge DataPage Wizard. <SCRIPT LANGUAGE="JavaScript"> var arrEl = Array.from(document.querySelectorAll('#InsertRecordPhone1, #InsertRecordPhone2, #InsertRecordPhone3')); let regExp = /^[0-9]+$/; arrEl.forEach(function(el) { el.maxLength = 14; el.addEventListener('input', function(v_e) { if (regExp.test(v_e.key)) { this.value = this.value.substr(0, this.value.length - 1); return false; } let v_value = (this.value.replace(/[^\d]/g, '')); console.log(v_value, this.value); if (v_value.length >= 7 && v_value.length < 10) { this.value = (v_value.substring(0, 3) + "-" + v_value.substring(3, 7) + v_value.substring(7, v_value.length)); } else if (v_value.length >= 10) { this.value = ("(" + v_value.substring(0, 3) + ") " + v_value.substring(3, 6) + "-" + v_value.substring(6, 10) +v_value.substring(10, v_value.length)); } }); }); </SCRIPT> Tips for Customization To customize this script to be used on an Update WebForm or a Details page of a Report DataPage, replace the prefix "InsertRecord" with "EditRecord" in the code. And make sure the field is not "Display Only" because this script is used for input fields. Tested Browsers This JavaScript solution was tested on the following platforms and Internet Browsers only. # MS Windows - IE 10, Firefox 23.0.1, Chrome 29.0.1547.57, Safari 5.1.7 # Macintosh # Firefox 3.6.22, Safari 5.1.7 Disclaimer: Use these JavaScript solutions at your own risk! They are provided to assist you in the customization of your programs and while we believe they work properly, by using them you accept all responsibility about them and confirm that they are not a feature of Caspio's platforms and as such are provided "as is" without any warranties, support or guarantees.12 points -
JavaScript Solution: Select multiple values from a listbox in a Submission Form Feature Description: This JavaScript solution shows how to enable the selection of multiple values from a listbox form element in a Submission Form DataPage. Multiple values in a listbox can be selected by holding the Ctrl key on the keyboard while clicking on the required values simultaneously. When the form is submitted, the values selected in the listbox are recorded as a series of all selected choices separated by commas. For example, assume that a listbox named States in a Submission Form contains names of all the different states in the United States. If the following three states California, Nevada and Oregon are selected in this listbox, the value stored in that field will be "California,Nevada,Oregon". Implementation: This solution can be used "as-is", without any changes if a. It is used in an Submission Form DataPage and b. The listbox field to enable multiple selection is called States. To use this solution copy and paste the code below, inside the HTML Footer section of the DataPage using the Caspio Bridge DataPage Wizard. <SCRIPT LANGUAGE="JavaScript"> document.addEventListener('DataPageReady', assignMultiple); function assignMultiple() { /* "fieldName" is the variable name for the listbox type form element field. */ let fieldName = "InsertRecordStates"; let x=document.getElementsByName(fieldName); x[0].multiple=true; } </SCRIPT> Additional Considerations To use this script with a field not named as States, change all occurrences of the text States in the script to the appropriate field name. If the States field is used in the Search page of a Report DataPage, configure it as a Text Field with contains as its comparison operator. Only then, a search initiated with even one of the three state names will return all records where those state names are found, including those containing multiple state names. Tested Browsers This JavaScript solution was tested on the following platforms and Internet Browsers only. # MS Windows - IE 11, Firefox 74.0, Chrome 81.0, MS Edge 42.0 # Mac OS - Firefox 74.0, Chrome 81.0, Safari 13.1 # Android - Firefox 74.0, Chrome 81.0 #iOs - Firefox 74.0, Chrome 81.0, Safari 13.1 Disclaimer: Use these JavaScript solutions at your own risk! They are provided to assist you in the customization of your programs and while we believe they work properly, by using them you accept all responsibility about them and confirm that they are not a feature of Caspio's platforms and as such are provided "as is" without any warranties, support or guarantees.10 points
-

Authentication Logouts - Windows 7/IE9 vs. Windows XP/IE8
pwqehqhf32 and 8 others reacted to docmgt for a question
Hi all, I'm deploying Caspio Bridge on an Intranet. For datapages that include a secondary details link - we consistently experience authentication errors with IE - depending on the OS or browser version. For Windows 7/IE9 - I get booted out; XP/IE8 - I can get to detail pages fine. Has anyone else encountered this? Using Chrome and Firefox - I do not get a boot out issue for detail links - HOWEVER, because we link to files on a server for the intranet - the preferred browser must be IE. The plugins for Chrome/Firefox don't correct our file linking. I don't want the end user experience to be bad - having to use 2 browsers is not acceptable. Any suggestions?9 points -
JS: Format tabular display on result page in four ways
bradleyqz3 and 8 others reacted to caspio for a topic
JavaScript Solution: Format tabular display on result page in four different ways Feature Description: This JavaScript solution shows how to format the Results page of a Search and Report DataPage in four different ways. For ease of reference, these formats are referred to as Type A, Type B, Type C and Type D respectively. The details are: a. Type A: Individual column - Background color b. Type B: Individual column - Font weight c. Type C: Individual row - Font weight d. Type D: Individual column - Conditionally format background color Features in this solution that can be easily customized are, a. Column number for Type A formatting. b. Column number for Type B formatting. c. Row number for Type C formatting. d. Column number for checking if a specified condition is met. Implementation: This solution can be used "as-is", without any changes if a. It is used in a Search and Report DataPage and b. The table to be formatted is the first table of the web page in which the DataPage is embedded, c. The 2nd column is to be formatted as Type A, d. The 3rd column is to be formatted as Type B, e. The 2nd row is to be formatted as Type C, f. The 3rd column is to be formatted as Type D if a cell in the column contains the value Yes. Note: Conditional formatting may not be displayed if the condition being checked is not satisfied by the data in the specified column. To use this solution, a. Highlight the code provided in the text area shown below and copy it. b. Paste it inside the HTML Footer section of the Results page using the Caspio Bridge DataPage Wizard. <SCRIPT LANGUAGE="JavaScript"> /*(1) tablenum is the number of the table to be formatted */ var tablenum = 0; /*(2) Two columns used for the different formatting styles */ var columnNum1 = 1; /*used in Type A */ var columnNum2 = 2; /*used in Type B and Type D */ /*(3) rowNum is the number of the row to be formatted */ rowNum = 2; //used in Type C /*(4) variables for colors. */ var white = '#FFFFFF'; var lightGrey = '#CCCCCC'; var yellow = '#FFFF00'; /*(5) variables for font style */ var fontStyle1 = 'bold'; /*(6) variable for condition to check in conditional formatting, Type D.*/ var conditionString = "Yes"; var tbl = document.getElementsByTagName('table')[tablenum]; var rows = tbl.getElementsByTagName('tr'); /*(7) Type C: style individual row: fontWeight */ rows[rowNum].style.fontWeight = fontStyle1; for (var row=0; row<rows.length;row++) { var cells = rows[row].getElementsByTagName('td'); /*(8) Type A: style individual column: background color */ cells[columnNum1].style.backgroundColor = lightGrey; /*(9) Type B: style individual column: fontweight */ cells[columnNum2].style.fontWeight = fontStyle1; /*(10) Type D: conditional formatting. */ if (cells[columnNum2].innerHTML == conditionString) { cells[columnNum2].style.backgroundColor= yellow; } } </SCRIPT> To customize this solution, change the values of the variables tablenum, columnNum1, columnNum2 and rowNum as required. Additional Considerations This solution may be difficult to customize if the web page in which the DataPage is embedded, contains a large number of tables. In order to see the full effect of this solution, the appropriate columns and rows have to exist in the data table. Variations of such formatting can be implemented easily by using this solution as a guideline. Tested Browsers This JavaScript solution was tested on the following platforms and Internet Browsers only. # MS Windows - IE 8.0, Firefox 3.5.7, Chrome 3.0.195.38, Safari 4.0.3 # Macintosh - Firefox 3.5.7, Safari 4.0.3 Disclaimer: Use these JavaScript solutions at your own risk! They are provided to assist you in the customization of your programs and while we believe they work properly, by using them you accept all responsibility about them and confirm that they are not a feature of Caspio's platforms and as such are provided "as is" without any warranties, support or guarantees.9 points -
JavaScript Solution: Concatenate/Combine two fields into one field Feature Description: This JavaScript solution shows how to perform a function in a Submission Form to combine two fields' values and put them into another field. Values entered in two fields "Position1" and"Position2" are concatenated and the result is stored in the field "AllPositions" upon submission. Implementation: This solution can be used "as-is", without any changes if a. It is used in a Submission Form DataPage and b. The fields Position1, Position2, and AllPositions exist in your table and the form. c. The form is the only one Caspio DataPage deployed on your web page. To use this solution copy and paste the code below, inside the HTML Footer section of the Submission Form using the Caspio Bridge DataPage Wizard. <SCRIPT LANGUAGE="JavaScript"> function concatenate() { var position1 = document.getElementById("InsertRecordPosition1").value; var position2 = document.getElementById("InsertRecordPosition2").value; var allpositions = position1 + position2; document.getElementById("InsertRecordAllPositions").value = allpositions; } document.getElementById("caspioform").onsubmit=concatenate; </SCRIPT> Tips for Customization To customize this script to be used on an Update Form or a Details page of a Search and Report DataPage, replace the prefix "InsertRecord" with "EditRecord" in the code. Tested Browsers This JavaScript solution was tested on the following platforms and Internet Browsers only. # MS Windows - IE 8.0, Firefox 3.6.3, Chrome 4.1.249, Safari 4.0.3 # Macintosh - Firefox 3.5.7, Safari 4.0.3 Disclaimer: Use these JavaScript solutions at your own risk! They are provided to assist you in the customization of your programs and while we believe they work properly, by using them you accept all responsibility about them and confirm that they are not a feature of Caspio's platforms and as such are provided "as is" without any warranties, support or guarantees.8 points
-
Js: Adding A Digital Signature To A Submission Form
Inscriptor and 6 others reacted to caspio for a topic
JavaScript Solution: Adding a Digital Signature to a Submission Form Feature Description: This JavaScript solution shows how to add a digital signature to a Submission form, Update form, and Details form. It also shows how to display the signature in Details and Results page of a Report. The signature pad is compatible with mobile devices as well. Note: This is a simple capture and displays a signature solution. It is not designed to replace a professional e-signature solution like DocuSign that assures security, legal, and visibility of all transactions with a complete audit trail. To explore integrating your application with a third-party solution such as DocuSign, contact Caspio Professional Services. Single Signature Pad Implementation: This solution can be used "as-is", without any changes if: It is used in a Submission Form DataPage. The field name in your table is "Signature" and the data type is Text (64000). To use this solution: a. Download the JavaScript file from here and unzip the file. Go to "All Assets" click on "Files" and upload this file. b. Go to app over, create an app parameter : Parameter Name = " SignaturePad", Type = "File" and for value browser the uploaded file. c. Copy the code below and Disable HTML editor then paste inside the Header section of your DataPage <script src="https://code.jquery.com/jquery-3.4.1.min.js"></script> <script src="[@app:SignaturePad/]"></script> d. Edit the Submission Form DataPage and choose form element "hidden" for "Signature" field in the Configure Fields screen. Insert an HTML Block after the "Signature" field. Go to the Source of the HTML Block and insert the following code. <!-- Caspio Added --> <div id="cb_sign_wrapper"> <p id="cb-sign-msg" style="display:none; color:white; background-color:red; font-weight:bold; padding:10px;"></p> <canvas class="pad" height="130" style="margin: 0px 0px 0px 15px; border-style: solid; border-width: 1px; border-color: #bbbbbb #dbdfe6 #e3e9ef #e2e3ea; -webkit-border-radius: 1px; -moz-border-radius: 1px; -o-border-radius: 1px; border-radius: 1px; -webkit-box-sizing: border-box; -moz-box-sizing: border-box; box-sizing: border-box; background-color: #FFFFFF;" width="300"></canvas><br /> <span style="margin: 0px 0px 0px 15px;display: flex;justify-content: center; }"> <input class="clearButton" type="reset" value="Clear" /></span> <input class="output" name="output" type="hidden" /> </div> e. Copy the code below and paste inside the Datapage Footer. <script> document.addEventListener('DataPageReady', function (event) { $('#cb_sign_wrapper').signaturePad({drawOnly : true}); }); document.addEventListener('BeforeFormSubmit', function (event) { // put the signature to the proper field $('input[name="InsertRecordSignature"]').val( $('#cb_sign_wrapper .output').val() ); }); </script> Two Signature Pads Implementation: This solution can be used "as-is", without any changes if: It is used in a Submission Form DataPage. The field names in your table is "Signature_1", Signature_2" and the data type is Text (64000). Repeat steps from a) to c) from the Single Signature Pad implementation above. d. Edit the Submission Form DataPage and choose form element "hidden" for "Signature_1" field in the Configure Fields screen. Insert an HTML Block after the "Signature_1" field. Go to the Source of the HTML Block and insert the following code. <!-- Caspio Added --> <div id="cb_sign_wrapper_1"> <p id="cb-sign-msg" style="display:none; color:white; background-color:red; font-weight:bold; padding:10px;"></p> <canvas class="pad" height="130" style="margin: 0px 0px 0px 15px; border-style: solid; border-width: 1px; border-color: #bbbbbb #dbdfe6 #e3e9ef #e2e3ea; -webkit-border-radius: 1px; -moz-border-radius: 1px; -o-border-radius: 1px; border-radius: 1px; -webkit-box-sizing: border-box; -moz-box-sizing: border-box; box-sizing: border-box; background-color: #FFFFFF;" width="300"></canvas><br /> <span style="margin: 0px 0px 0px 15px;display: flex; justify-content: center;"> <input class="clearButton" type="reset" value="Clear" /></span> <input class="output" name="output" type="hidden" /> </div> e. Repeat steps from above and insert in HTML Block the following code: <!-- Caspio Added --> <div id="cb_sign_wrapper_2"> <p id="cb-sign-msg" style="display:none; color:white; background-color:red; font-weight:bold; padding:10px;"></p> <canvas class="pad" height="130" style="margin: 0px 0px 0px 15px; border-style: solid; border-width: 1px; border-color: #bbbbbb #dbdfe6 #e3e9ef #e2e3ea; -webkit-border-radius: 1px; -moz-border-radius: 1px; -o-border-radius: 1px; border-radius: 1px; -webkit-box-sizing: border-box; -moz-box-sizing: border-box; box-sizing: border-box; background-color: #FFFFFF;" width="300"></canvas><br /> <span style="margin: 0px 0px 0px 15px;display: flex; justify-content: center;"> <input class="clearButton" type="reset" value="Clear" /></span> <input class="output" name="output" type="hidden" /> </div> f. Copy the code below and paste inside the Datapage Footer. <script> document.addEventListener('DataPageReady', function (event) { $('#cb_sign_wrapper_1').signaturePad({drawOnly : true}); $('#cb_sign_wrapper_2').signaturePad({drawOnly : true}); }); document.addEventListener('BeforeFormSubmit', function (event) { // put the signatures on the proper fields $('input[name="InsertRecordSignature_1"]').val( $('#cb_sign_wrapper_1 .output').val() ); $('input[name="InsertRecordSignature_2"]').val( $('#cb_sign_wrapper_2 .output').val() ); }); </script> Tips for Customization To customize the signature "window", you can adjust the width and height inside the HTML Block on step "d" above. You can also modify the border width by changing the "border-width" from 1px to a desirable width. To customize the script to capture a signature on an Update Form or a Details page of a Report DataPage, replace the prefix "InsertRecord" with "EditRecord" in the Datapage Footer on step "e" (single pad solution) or "f" (two pads solution) above. To display the signature in Details, Update DataPage, insert an HTML Block, repeat step c) from the above, and go to the Source of the HTML Block and insert the following code. <div class="sigPad"><canvas class="pad" height="100" width="220"></canvas></div> <script> var sig = '[@field:Signature!]'; $('.sigPad').signaturePad({displayOnly:true}).regenerate(sig); </script> To display the signature in a results page of a Report DataPage, insert an HTML Block, repeat step c) from the above, and go to the Source of the HTML Block and insert the following code. <div class="sigPad[@cbRecordIndex#]"><canvas class="pad" height="150" width="300"></canvas></div> <script> var sig[@cbRecordIndex#] = '[@field:Signature!]'; $('.sigPad[@cbRecordIndex#]').signaturePad({displayOnly:true}).regenerate(sig[@cbRecordIndex#]); </script> Tested Browsers This JavaScript solution was tested on the following platforms and Internet Browsers only. # MS Windows - IE 11, Firefox 74.0, Chrome 81.0, MS Edge 42.0 # Mac OS - Firefox 74.0, Chrome 81.0, Safari 13.1 # Android - Firefox 74.0, Chrome 81.0 #iOs - Firefox 74.0, Chrome 81.0, Safari 13.1 Disclaimer: Use these JavaScript solutions at your own risk! They are provided to assist you in the customization of your programs and while we believe they work properly, by using them you accept all responsibility about them and confirm that they are not a feature of Caspio's platforms and as such are provided "as is" without any warranties, support or guarantees. 7 points
 -

User authentication
ArdmxurEn and 6 others reacted to lugoimports for a question
I have a table used to authenticate access. For some reason, I currently have 24 users and it works. The problem is I'm trying to add more and the id/password doesn't work for the new users. What am I doing wrong? Is there a restriction as far as how many users you can have???7 points -
Check out this trick I stumbled upon. Put Caspio Variables into your Classes so you can use CSS to dynamically style your pages. (js not required) Div to dynamically format <div class="action[@field:action]"></div> css .actionCall { background-image: URL("../img/call.png"); } .actionEmail { background-image: URL("../img/email.png"); } .actionText { background-image: URL("../img/text.png"); } Dynamic Elements - load all options, and hide all but needed <a class="btnFile fileName[@field:FileName]" href="../some/dir/[@field:FileName]">Download</a> <a class="btnLink fileLink[@field:FileLink]" href="[@field:FileLink]">View File</a> css /*-- when [@field:***] is null, hide the div --*/ .fileName, .fileLink { display: none; } Hope this helps Think Easy CHAD -I know the Title of this Forum is "Ask....", but IDK where else to share stuff like this.6 points
-
JavaScript Solution: Auto-Submit a DataPage Feature Description: This JavaScript solution shows how to auto-submit a DataPage. Caspio DataPage only submits to one table so if you need to perform submission to multiple tables you can use another DataPage and the following JavaScript to auto submit. Implementation: This solution can be used "as-is", without any changes if a. It is used in a Submission, Single Record Update, or Details DataPage and b. The DataPage is the only one Caspio DataPage deployed on your web page. c. The "progress_bar" image exists on your site: www.yoursite.com/images/progress_bar.gif. Or the URL should be adjusted to where your file is located. To use this solution, copy the code below and paste inside the HTML Header section of the DataPage using the Caspio Bridge DataPage Wizard. <div align="center" id="processing"> <p>Processing...</p> <img src="images/progress_bar.gif" alt="Progress Bar" width="200" height="15" /> </div> Then insert an HTML Block, copy the code below and paste inside the HTML Block section: <script type="text/javascript"> document.addEventListener('DataPageReady', function (event) { const error = document.querySelector('div[data-cb-name="HeaderErrorMsg"]'); if(!error){ if(document.getElementById("caspioform")) { document.getElementById("caspioform").style.display = 'none'; setTimeout('document.forms["caspioform"].submit()',1000); } } }); </script> In submission successful message area, click on Source button and paste the code below. <style type="text/css"> #processing{ display:none; } </style> Tested Browsers This JavaScript solution was tested on the following platforms and Internet Browsers only. # MS Windows - IE 10, Firefox 25.0.1, Chrome 31.0.1650.57, Safari 5.1.7 Disclaimer: Use these JavaScript solutions at your own risk! They are provided to assist you in the customization of your programs and while we believe they work properly, by using them you accept all responsibility about them and confirm that they are not a feature of Caspio's platforms and as such are provided "as is" without any warranties, support or guarantees.6 points
-
How to integrate the web service profile in Caspio Bridge and integrate it with Java API. Do we have to download Eclipse and Tomcat in our local system, configure everything and then use WSDL to call my Caspio account. Please advise.6 points
-

Passing value to a variable in a query dynamically(Web API)
wayanmariasa and 5 others reacted to supra01 for a question
In the Select Query while using Caspio Web Services API, SAY stub.selectDataRaw("acnt name", "API profilename ", new String(""), "tablename", true, "proj_comp_id, timesheet_from_date , timesheet_to_date", "criteriaField.getText()" , orderByField.getText(), ",", ","); Need to know how to pass the criteria dynamically as "proj_comp_id = $project_Id" for criteriaField.getText()??? If I hard code the value of project id to be some value say 140, it works..Struck with passing it dynamically. Thanks6 points -
JS: Change tab order of fields on a WebForm
Josephduby and 5 others reacted to caspio for a topic
JavaScript Solution: Change tab order of fields on a Submission Form Feature Description: Tab index defines the order in which form elements will receive focus when navigated by the user via the keyboard. This JavaScript solution shows how to change tab order in a Submission Form fields. This is usually used for a multi-column form. A typical situation is, on a two-column form with "Top to bottom" fill order, you would like to change the tab index order from "Left to right" to "Top to bottom". Implementation: This solution can be used "as-is", without any changes if a. It is used in a Submission Form. b. The fields First_Name, Last_Name, Email and Phone_Number exist in your table and the form. c. The tab index will be set into First_Name >> Last_Name >> Email >> Phone_Number. To use this solution, a. Highlight Header_code provided in the text area shown below and copy it. Paste it inside the HTML Header section of the Submission Form using the Caspio Bridge DataPage Wizard, and b. Highlight Footer_code provided in the text area shown below and copy it. Paste it inside the HTML Footer section of the Submission Form using the Caspio Bridge DataPage Wizard. Header Code: <script type="text/javascript"> function changeTabIndex() { document.getElementById('InsertRecordFirst_Name').tabIndex="1"; document.getElementById('InsertRecordLast_Name').tabIndex="2"; document.getElementById('InsertRecordEmail').tabIndex="3"; document.getElementById('InsertRecordWork_Phone').tabIndex="4"; } </script> Footer Code: <script type="text/javascript"> document.addEventListener('DataPageReady', changeTabIndex); </script> Tips for Customization a. To use this script with different field names, change the occurrences of "First_Name", "Last_Name", "Email" and "Work_Phone" in the script to the appropriate field names. b. To use this script in an Update Form or a Details page of a Search and Report DataPage, replace the prefix "InsertRecord" with "EditRecord" in the code. Tested Browsers This JavaScript solution was tested on the following platforms and Internet Browsers only. # MS Windows - IE 8.0, Firefox 3.6.3, Chrome 4.1, Safari 4.0.5 # Macintosh - Firefox 3.6.3, Safari 4.0.3 Disclaimer: Use these JavaScript solutions at your own risk! They are provided to assist you in the customization of your programs and while we believe they work properly, by using them you accept all responsibility about them and confirm that they are not a feature of Caspio's platforms and as such are provided "as is" without any warranties, support or guarantees.6 points -
JS: Subtract two date values and store the difference
bradleyqz3 and 5 others reacted to caspio for a topic
JavaScript Solution: Subtract two date values to obtain the number of years the dates differ Feature Description: This JavaScript solution shows how to perform date arithmetic in a Submission Form. Two date values entered into fields of a form are subtracted to return the number of years by which they differ. The result is stored in another field in the same Submission Form. This calculation is performed when the DataPage is submitted by the user. Implementation: This solution can be used "as-is", without any changes if a. It is used in an Submission Form DataPage and b. The two date values to be subtracted are in the Caspio Bridge supported Date/Time format of mm/dd/yyyy and c. The input date fields are named StartDate and EndDate while the field storing the difference is named Years. To use this solution copy and paste the code below, inside the HTML Footer section of the Submission Form using the Caspio Bridge DataPage Wizard. <SCRIPT LANGUAGE="JavaScript"> function getDiff() { /* Retrieve the value of the field StartDate and store in a variable 'v_sDate' */ var v_sDate = document.getElementById("InsertRecordStartDate").value; /* Retrieve the value of the field EndDate and store in a variable 'v_eDate' */ var v_eDate = document.getElementById("InsertRecordEndDate").value; var sDate = new Date(v_sDate); var eDate = new Date(v_eDate); var sYear = sDate.getFullYear(); var eYear = eDate.getFullYear(); var years = Math.abs(eYear - sYear); /* Insert the diffrencer stored in years into the DataPage field Years */ document.getElementById("InsertRecordYears").value=years; } /* On submitting the webform, the function getDiff is executed */ document.getElementById("caspioform").onsubmit=getDiff; </SCRIPT> Here is another example using BeginDate and FinishDate to calculate and store the YearsDifference: <SCRIPT LANGUAGE="JavaScript"> function getDiff() { var v_sDate = document.getElementById("InsertRecordBeginDate").value; var v_eDate = document.getElementById("InsertRecordFinishDate").value; var sDate = new Date(v_sDate); var eDate = new Date(v_eDate); var sYear = sDate.getFullYear(); var eYear = eDate.getFullYear(); var years = Math.abs(eYear - sYear); document.getElementById("InsertRecordYearsDifference").value=years; } /* On submitting the webform, the function getDiff is executed */ document.getElementById("caspioform").onsubmit=getDiff; </SCRIPT> Additional Considerations # The field that stores the result of the calculation may have validation rules placed upon it which may prevent this solution from working correctly. Tested Browsers This JavaScript solution was tested on the following platforms and Internet Browsers only. # MS Windows - IE 8.0, Firefox 3.5.7, Chrome 3.0.195.38, Safari 4.0.3 # Macintosh - Firefox 3.5.7, Safari 4.0.3 Disclaimer: Use these JavaScript solutions at your own risk! They are provided to assist you in the customization of your programs and while we believe they work properly, by using them you accept all responsibility about them and confirm that they are not a feature of Caspio's platforms and as such are provided "as is" without any warranties, support or guarantees.6 points -
JavaScript Solution: Perform a calculation on values entered in a Submission Form Feature Description: This JavaScript solution shows how to perform a mathematical calculation such as multiplication in a Submission Form DataPage. Values entered in the form are multiplied and the result is stored in a field on the same form. This calculation is performed when the DataPage is submitted by the user. For example, if the values 15 and 2 are input into two fields named Height and Width respectively, the value 30 is automatically inserted into a field named Area. Implementation: This solution can be used "as-is", without any changes if a. It is used in an Submission Form and b. The fields Height, Width and Area exist in the table and the form. To use this solution copy and paste the code below, inside the HTML Footer section of the Submission Form using the Caspio Bridge DataPage Wizard. <SCRIPT LANGUAGE="JavaScript"> function calculate() { /* Retrieve the value of the field Height and store in a variable 'v_height' */ var v_height = parseFloat(document.getElementById("InsertRecordHeight").value); /* Retrieve the value of the field Width and store in a variable 'v_width' */ var v_width = parseFloat(document.getElementById("InsertRecordWidth").value); /* Multiply the value height and width to obtain the value of 'v_area' */ var v_area= (v_height * v_width); /* Insert a rounded value of the variable 'v_height' into the DataPage field Area */ document.getElementById("InsertRecordArea").value = Math.round(v_area); } /* On submitting the webform, the function calculate is executed */ document.getElementById("caspioform").onsubmit=calculate; </SCRIPT> Here is another example using Price and Quantity to calculate and store the Total: <SCRIPT LANGUAGE="JavaScript"> function calculate() { var v_price = parseFloat(document.getElementById("InsertRecordPrice").value); var v_quantity = parseFloat(document.getElementById("InsertRecordQuantity").value); var v_total = (v_price * v_quantity); document.getElementById("InsertRecordTotal").value = Math.round(v_total); } /* On submitting the webform, the function calculate is executed */ document.getElementById("caspioform").onsubmit=calculate; </SCRIPT> Additional Considerations This solution is best used to perform simple calculations with small numbers. The field that stores the result of the calculation may have validation rules placed upon it which may prevent this solution from working correctly. To customize this script to be used on an Update Form or a Details page of a Search and Report DataPage, replace the prefix "InsertRecord" with "EditRecord" in the code. Tested Browsers This JavaScript solution was tested on the following platforms and Internet Browsers only. # MS Windows - IE 8.0, Firefox 3.5.7, Chrome 3.0.195.38, Safari 4.0.3 # Macintosh - Firefox 3.5.7, Safari 4.0.3 Disclaimer: Use these JavaScript solutions at your own risk! They are provided to assist you in the customization of your programs and while we believe they work properly, by using them you accept all responsibility about them and confirm that they are not a feature of Caspio's platforms and as such are provided "as is" without any warranties, support or guarantees.6 points
-
The Caspio platform is free of charge for producing non-commercial apps in support of Ukraine and the Ukrainian refugee crisis. If you need an app, please post your requirements here, and we will do our best to match you with someone who can build it. Caspio developers: we call on you to join the mission. For non-profits or people with ideas: please post your idea here without revealing any confidential details. For volunteers who can help with the app development: post your website or contact details here. Read this press release for the complete details: https://www.caspio.com/news/articles/caspio-provides-free-no-code-platform-to-help-ukraine/5 points
-
.thumb.jpg.03878e50b4d1236f6c1e432d00fe2a55.jpg)
Login after User Registration
Nursultan and 4 others reacted to DefinitelyNot31337 for a question
Hello @TroubleShooter, Yes, you can. Currently, it is only possible with JavaScript. The idea is to place the Registration Form and Standalone Login Page side-by-side (or at least, in the same page). You may hide the Login Form ( using <div style="display: none;"></div> on the Header/Footer of the DataPage || More about here...), on your Registration Page but I rather keep them visible so the users can opt to just log-in if they already have an account; or register, if they don't. After registration, JavaScript will fill-out the login form, and submits it programatically, therefore logging-in the newly registered user. The only requirements to this implementation are: 1.) Login DataPage and Registration Form DataPage are deployed on the same page. 2.) Both DataPages are AJAX-Enabled! 3.) Headers/Footers should have the HTML Editor disabled from the Advanced tab. Without futher ado, let's do this. 1.) Open DataPage Configuration for your Registration Page: 2.) Go to 'Configure Fields Section' 2.1.) Add a Header and Footer (Disable HTML Editor from the advanced tab) 2.2.) Paste the code snippet in the Footer and modify the following information. <script> document.addEventListener('BeforeFormSubmit', function() { var registrationDP = "[@cbAppKey]"; var loginDP = "378fd3458dfsjhefjhqerwfdsyui3274239"; //Replace with the AppKey of your Standalone Login Scren var username_field = "username"; //replace with the name of your username field (CASE SENSITIVE!) var password_field = "password"; //replace with the name of your password field (CASE SENSITIVE!) //No modifications necessary from this point onward. document.querySelector(`[action*="${loginDP}"] [id*=xip_username]`).value = document.querySelector(`[action*="${registrationDP}"] [id*=InsertRecord${username_field}]`).value document.querySelector(`[action*="${loginDP}"] [id*=xip_password]`).value = document.querySelector(`[action*="${registrationDP}"] [id*=InsertRecord${password_field}]`).value }) </script> 5.) Go to 'Destination and Messaging' 5.5) Set Destination after record submit to: Display a message; Disable the HMTL Editor! 5.6) Paste the code snippet below; then modify. Registered Successfully. <script> var loginDP = "378fd3458dfsjhefjhqerwfdsyui3274239"; document.querySelector(`[action*="${loginDP}"]`).submit(); </script> After saving, you should be good to go. Working example: https://stage.caspio.com/support/forums/DefinitelyNot31337/register-login/index.html Application Export Package: CaspioData_2019-Apr-02_0219.zip Good luck and happy hacking! Regards DN31337!5 points -
JavaScript Solution: Select multiple values from a listbox in an Update DataPage Feature Description: This JavaScript solution shows how to enable the selection of multiple values using a listbox form element in an Update or Details DataPage. When the DataPage is submitted, the values selected in the listbox are stored in the table as a comma-separated string. For example: A field named state in a table contains US states. If three states California, Nevada and Oregon are selected in this listbox, the value stored in that field will be "California, Nevada, Oregon". When the DataPage is opened, the current values will be preselected in the listbox. Implementation: This solution can be used "as-is", without any changes if a. It is used in an Update or Details DataPage and b. The field name state exists in the DataPage. To use this solution, copy the code below and paste inside the HTML Footer section of the Update/Details DataPage using the Caspio Bridge DataPage Wizard. <script type="text/javascript"> var v_state = "[@field:state]" ; var o_state = document.getElementById("EditRecordstate") ; o_state.multiple = true ; function f_listbox() { if ( v_state.indexOf(",") > 0 ) { for (var i=0 ; i < o_state.options.length; i++ ) { if(o_state[i].value == v_state) { o_state.remove(i); break ; } } var o_st = v_state.split(", ") ; for (var j=0 ; j < o_st.length; j++) { for (var i=0 ; i < o_state.options.length; i++ ) { if(o_st[j]== o_state.options[i].value){ o_state.options[i].selected = true ; break ; } } } } } document.addEventListener('DataPageReady', f_listbox); //You can also use the line below instead of the eventlistener // setTimeout(f_listbox, 20); </script> Tips for Customization To customize this script to enable the same feature for the additional field, duplicate the first three lines using your second field name. Then duplicate the code inside the f_listbox function. Tested Browsers This JavaScript solution was tested on the following platforms and Internet Browsers only. # MS Windows - IE 10, Firefox 25.0.1, Chrome 31.0.1650.57, Safari 5.1.7 Disclaimer: Use these JavaScript solutions at your own risk! They are provided to assist you in the customization of your programs and while we believe they work properly, by using them you accept all responsibility about them and confirm that they are not a feature of Caspio's platforms and as such are provided "as is" without any warranties, support or guarantees.5 points
-
JavaScript Solution: Calculate the sum of a column values in the result page Feature Description: This JavaScript solution shows how to perform the sum of all elements of column in a result page. The result is displayed in a row below the last record. For example, if the results have 3 records, and the values in a specific column are 12.00, 25.20, and 45.65, the sum (82.85) will be shown in a row below the last record. Implementation: This solution can be used "as-is", without any changes if a. It is used in a Search and Report DataPage b. The results page has 5 columns c. It calculates the sum of the items of the 4th column To use this solution, a. Highlight to copy the code provided in the text area shown below. b. Paste the respective snippet inside the HTML Header or HTML Footer section of the Results page of the Search and Report DataPage. Header: <div id="cb_resultTotal"> Footer: </div> <script> function NumberFormatted(amount,decimal) { if(isNaN(amount)) i = 0.00; else { var v_number = parseFloat(amount); var v_minus = ''; if(v_number < 0) v_minus = '-'; v_number = Math.abs(v_number); v_number = Math.round(v_number*Math.pow(10,decimal)); v_number = v_number/Math.pow(10,decimal); v_numStr = new String(v_number); v_decStr = new String(Math.pow(10,decimal)); if(v_numStr.indexOf(".") < 0) v_numStr = v_numStr + "." + v_decStr.substr(1,v_decStr.length); else v_numStr = v_numStr + v_decStr.substr(1,v_decStr.length); return (v_minus + v_numStr.substr(0,v_numStr.indexOf(".") + decimal + 1)); } } function f_calTotal() { var v_totalRev = 0; var v_rev = 0; var cas_form = document.getElementById("cb_resultTotal"); if (cas_form.getElementsByTagName("table").length > 0) { var cas_rows = cas_form.getElementsByTagName("table")[1].getElementsByTagName("tr"); for(var rowIndex=1; rowIndex < cas_rows.length; rowIndex++) { var cells = cas_rows[rowIndex].getElementsByTagName("td"); /* 1 – change value inside brackets to choose column to calculate sum */ v_rev = cells[3].innerHTML; if ( v_rev != " " && !isNaN(v_rev.substr(1))) v_totalRev = v_totalRev + parseFloat(v_rev); } var v_nrow = cas_rows.length; cas_form.getElementsByTagName("table")[1].insertRow(v_nrow); var o_lastRow = cas_form.getElementsByTagName("table")[1].rows[v_nrow]; o_lastRow.style.background = "#385C7E"; o_lastRow.insertCell(0); o_lastRow.insertCell(1); /* 2 – Display the “Total†label (2 lines below) */ var v_colText = o_lastRow.insertCell(2); v_colText.innerHTML = "<div style='padding:5px;color:#ffffff;font-size:14px;font-weight:bold;font-family:Arial'>Total</div>"; var v_colValue = o_lastRow.insertCell(3); /* 3 – Display the result of the calculation (2 lines below) */ v_colValue.innerHTML = "<div style='padding:5px;color:#ffffff;font-size:14px;font-weight:bold;;font-family:Arial'>$" + NumberFormatted(v_totalRev,2) + "</div>"; o_lastRow.insertCell(4); } } </script> <script> f_calTotal(); </script> Tips for Customization Follow these steps to customize this script for different column positions: a. Change the line of code immediately below comment (1) to: v_rev = cells[COLUMNNUMBER].innerHTML;where COLUMNNUMBER is the index of the column you wish to sum. Remember that column indexes start at 0 (ZERO).b. Change the line of code immediately below comment (2) to: var v_colText = o_lastRow.insertCell(COLUMNNUMBER-1);c. Change the line of code immediately below comment (3) to: var v_colValue = o_lastRow.insertCell(COLUMNNUMBER);d. Ensure that for every column, except for columns COLUMNNUMBER and COLUMNNUMBER-1, there is the following line of code: o_lastRow.insertCell(INDEX);where INDEX is the index of the column. Also, make sure they are in order (i.e. o_lastRow.insertCell(0); is before o_lastRow.insertCell(1); and so on)Tested Browsers This JavaScript solution was tested on the following platforms and Internet Browsers only. • MS Windows - IE 8.0, Firefox 3.5.7, Chrome 3.0.195.38, Safari 4.0.3 • Macintosh - Firefox 3.5.7, Safari 4.0.3 Disclaimer: Use these JavaScript solutions at your own risk! They are provided to assist you in the customization of your programs and while we believe they work properly, by using them you accept all responsibility about them and confirm that they are not a feature of Caspio's platforms and as such are provided "as is" without any warranties, support or guarantees.5 points
-
JavaScript Solution: Automatically insert the current date and time into a field Feature Description: This JavaScript solution will grab the local date and time from the user's computer and automatically insert it into a field named TimeofView in your Caspio Bridge DataPage. Format of date and time is set to m/d/yyyy hh:mm Implementation: This solution can be used "as-is", without any changes if a. It is used in an Update Form or Details page of a Search and Report DataPage and b. The name of the field storing the local date and time is called TimeofView. To use this solution copy and paste the code below, inside the HTML Footer section of the Details page of the DataPage using the Caspio Bridge DataPage Wizard. <SCRIPT LANGUAGE="JavaScript"> /* Declaration and initialization */ Stamp = new Date(); var v_TimeStamp; Hours = Stamp.getHours() Mins = Stamp.getMinutes(); /* Attach a prefix with digit '0' if the minutes is less than 10. */ if (Mins < 10) { Mins = "0" + Mins; } /* Construct the value of the v_TimeStamp variable in the format m/d/yyyy hh:mm */ v_TimeStamp=('' + (Stamp.getMonth() + 1) +"/"+Stamp.getDate()+ "/"+Stamp.getFullYear() + ' ' + Hours + ":" + Mins); /* Field name - TimeofView is referred with a prefix - EditRecord */ document.getElementById("EditRecordTimeofView").value=v_TimeStamp; </SCRIPT> To use this script in a Submission Form, change "editrecord" to "insertrecord" so modify the last line of code from document.getElementById("EditRecordTimeofView").value=v_TimeStamp; to document.getElementById("InsertRecordTimeofView").value=v_TimeStamp; Additional Considerations To use this script with a field not named as TimeofView, change all occurrences of the text TimeofView in the script to the appropriate field name. The accuracy of the date and time stamped is dependent on the date and time set on the user's local computer. The script does not take into account the time zone in which the date and timestamp are created. Tested Browsers This JavaScript solution was tested on the following platforms and Internet Browsers only. # MS Windows - IE 8.0, Firefox 3.5.7, Chrome 3.0.195.38, Safari 4.0.3 # Macintosh - Firefox 3.5.7, Safari 4.0.3 Disclaimer: Use these JavaScript solutions at your own risk! They are provided to assist you in the customization of your programs and while we believe they work properly, by using them you accept all responsibility about them and confirm that they are not a feature of Caspio's platforms and as such are provided "as is" without any warranties, support or guarantees.5 points
-
Hi, Just wanna share this script I made that changes the background color of each record in a Gallery Report DataPage when clicking the button. For the button: <button onclick="RandomColor()">Try it</button> For the function that's responsible for changing the colors (For this one, there is no fixed set of color because this makes use of randomizers for setting the color code, so all colors possible can show up): <script> function RandomColor() { var x = document.querySelector("section[class*='cbColumnarReport cbReportSection']"); x.querySelectorAll('div > div:nth-child(1)').forEach(e => e.style.backgroundColor = '#' + ('0'+(Math.random()*255|0).toString(16)).slice(-2) + ('0'+(Math.random()*255|0).toString(16)).slice(-2) + ('0'+(Math.random()*255|0).toString(16)).slice(-2)) } </script> Sample DP: https://c1hch576.caspio.com/dp/db26a00071c83c69ac9947d1bfd9 Alternatively, if you only wish to have a predefined set of colors to choose from, you can use this (simply change the colors in the array to your liking): <script> var colors = ["red", "blue", "green","orange","yellow","violet","lightblue","cyan","magenta"]; function RandomColor() { var x = document.querySelector("section[class*='cbColumnarReport cbReportSection']"); x.querySelectorAll('div > div:nth-child(1)').forEach(e => e.style.backgroundColor = colors[Math.floor(Math.random() * colors.length)]) } </script> Sample DP: https://c1hch576.caspio.com/dp/db26a000574d59f66468479b955a Hope this helps!


 4 points
 -

Date validation on Submission Form
Volomeister and 3 others reacted to Alexray for a topic
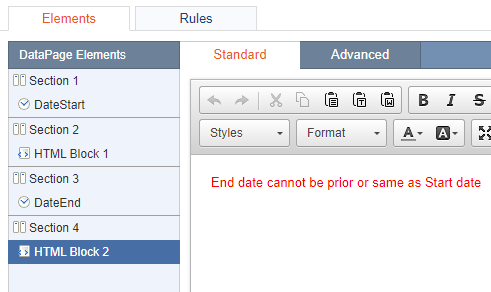
Hello Caspio Family, Unfortunately, Caspio doesn't have a feature that would allow validating the date before the Submission Form. The only way I found using Caspio standard features is to show a warning message when the date doesn't fit the condition (e.g. when the date should not be prior to today). You can do that with the help of rules. I will show you an example with two dates 'Start Date' and 'End Date' with conditions: the Start Date shouldn't be prior to today and the End Date should not equal or be before the Start Date. 1) Add 2 HTML blocks beneath each Date field and add a section to each HTML block 2) Inside HTML blocks we need to add some warning message in case the condition is not met 3) Create 2 Rules as on screenshots That solution will show our warning messages, but won't prevent form submission if a user disregards the warning. But if it is necessary to let users submit only correct dates, you can use the second solution with JavaScript: 1. Insert Header&Footer, HTML block 1, HTML block 2, and place them below our Date fields. No need to add extra sections. 2. In the Header enable 'Source' and paste the code:<script>document.addEventListener("BeforeFormSubmit", function (event) {startDate = document.querySelector("#InsertRecordDateStart").value;endDate = document.querySelector("#InsertRecordDateEnd").value;warn1 = document.querySelector("#warning1");warn2 = document.querySelector("#warning2");var today = new Date();var dd = String(today.getDate()).padStart(2, '0');var mm = String(today.getMonth() + 1).padStart(2, '0'); //January is 0!var yyyy = today.getFullYear();today = mm + '/' + dd + '/' + yyyy;if (startDate < today) {event.preventDefault();warn1.style.display = 'block'} else {warn1.style.display = 'none'}if (endDate <= startDate) {event.preventDefault();warn2.style.display = 'block'} else {warn2.style.display = 'none'}});</script> 3. In the HTML block 1 enable 'Source' and paste:<span id="warning1" style="color:#FF0000;display:none;">Start date cannot be in the past or empty</span> 4. In the HTML block 2 enable 'Source' and paste:<span id="warning2" style="color:#FF0000;display:none;">End date cannot be prior or same as Start date or empty</span> 5. Make sure your datafield 1 and datafield 2 are called 'DateStart' and 'DateEnd' respectively or in the JavaScript added to the Header you need to replace in the linesstartDate = document.querySelector("#InsertRecordDateStart").value;endDate = document.querySelector("#InsertRecordDateEnd").value;to the name of the fields you have. You can test to see how it works on my DataPages: 1st solution with Rules 2nd solution with JS


 4 points
 -
Hello All, I just wanted to share this link with everyone in case you are looking to create a quick PDF from a DataPage: http://pdfcrowd.com/save-to-pdf/ You can simply add this line of code to create a link to generate a PDF: <a href="//pdfcrowd.com/url_to_pdf/">Save to PDF</a> Just wanted to share this with everyone!4 points
-

Import files then insert into table
ReeganAnne and 3 others reacted to MattD for a question
I was trying to figure out how to insert a large number of photos (>1000) into a table of staff. I could successfully import the files into caspio bridge, but could not find a documented way to automate the process of inserting these into the table. Support did not think it was possible, but I was able to find a solution! Posting this in case it is helpful for others. Solution: 1. Ensure each file is named in a way that allows it to be linked to the rest of the data. In my case I named each file with the linkage key 'staff_id' e.g. "1.jpg" 2. Upload the files into a folder in Caspio bridge, as documented elsewhere. In my example, this is /photos/. 3. In the table, create a formula field that generates the path of the file that corresponds to the record. E.g. in my dataset, the path for the correct file is "/photos/1.jpg"; where staff_id = '1'. The formula is: '/photos/' + CONVERT(VARCHAR, [@field:staff_id]) + '.jpg' 4. Save this field. It should now contain a generated list of paths. 5. Go back to the Table Design section and change the field type from "Formula" to "File". It will convert the type to "File" but retain the path data and now the file is correctly embedded. I have suggested that Caspio support add this to their documentation as I think it could be a very useful feature.4 points -

Data Usage Thoughts, Tools, Tactics
sophietheand and 3 others reacted to LWSChad for a question
Hi All, I had a great conversation with Caspio support a few weeks ago that helped my significantly reduce the amount of data that my app uses. Here are the cliff notes. To see how much data your pages use, paste the URL from the deploy menu into a new web browser, and use a development tool or web inspector to investigate. (in Chrome press F12, and click the Network tab) Records per page is a big factor in data usage... nearly a linear relationship. Ajax is a big load up front, but will help if you encounter many "paging" actions... long reports. Happy Building4 points -
Thank you, Caspio, for offering this. I unfortunately do not have the bandwidth to take on any projects at the time, but I can offer some free consultations. To schedule a time, visit https://lightbulb.as.me/consulting and choose a time. To get a consultation for free, use the coupon code свобода. Somewhere in the form, add your Caspio account id so I can confirm you have a free Caspio account. Stay safe! CHAD4 points
-

Google Map Mashup Set-Up with Casio URL Deployment
sistemaslt and 3 others reacted to jbloome for a question
Howdy All, My Google Maps finally work and after two days I have an answer to my question which you might find useful. 1) I don't use a webpage so my deployment method is URL in Caspio's servers. 2) Search for Google Cloud API console and sign up for a billed API account (I had a free account and didn't realize I had to have an API attached to a billed account). I think with the billed account the free Map View limit is 28,000 inquiries/month before incurring expenses. 3) Start a new project through the Google Console and get your API code for your billed account. 4) On your Google Cloud API account search the API library and Enable the API for Maps Javascript API and Geocoding. 5) On the map mashup select the search and results table from where you are pulling data not the datapage where you might have the map mashup (e.g. my maps search datapage pulls data from my homes_table, in this case I would choose the homes_search and results datapage pulling from the homes_tbl not the maps search and results datapage). 6) Make sure you add your own customized field (e.g. in addition to city, state, zip my Address field is called Address1 and I had to add this field to generate the proper code snippets which included Address1 not Address which is the default). 7) For the map mashup the first code snippet "before the webpage deployment" goes into a header for the Configure Results Page Field. 8) The 2nd code snippet goes in a HTML block(make sure that it is at the bottom with no other fields below it) on the Configure Results Page. 9) The 3rd code snippet goes in a HTML block (make sure that it is at the bottom with no other fields below it) on the Configure Details Page. 10) On your Datapage Data Source page uncheck Responsive, go to Your Results Page and uncheck all the editing options, go back to the Datapage Data Source and check disable AJAX loading. That should work!4 points -
Keep in mind hiding these buttons through CSS will not disable them. If anyone presses 'Enter' they will be able to 'click' the button. You need JavaScript to disable it completely and then use CSS for hiding, or you can use JavaScript for both. For Submission, you do it like: <script> document.getElementsByClassName('cbSubmitButton')[0].disabled = true; document.getElementsByClassName('cbSubmitButton')[0].style.display = 'none'; </script> Update Form/Details Page <script> document.getElementsByClassName('cbUpdateButton')[0].disabled = true; document.getElementsByClassName('cbUpdateButton')[0].style.display = 'none'; </script> If you have multiple forms on a single Webpage, just change 0 to any number depending on the order of the forms, 0 means it's the first form, and so on. If you just really want to hide, then just remove the 1st line.4 points
-
Hello @IamGroot, Just wanted to inform you, I found a way to export/import a table/database with List-DataType value inside it. 1. Change the DataType to "Text(255) field" and Export it. 2. And in your Excel file, make sure that the value for the List-String field is comma separated like this: (Item1,Item2,Item3,Item4, etc.) 3. Proceed with the import as usual. After successfully importing your file. Go to your Table and to the Table Design. 4. Change the "Text(255) Field" (The one we changed in step 1) back to List-String DataType. 5. Then it will just return the way it was. If you want to export it (reapeat step(1)). I hope this helps ~WatashiwaJin~4 points
-

Connect to Google Drive
Harbinger and 3 others reacted to LunaLovegood for a question
Hello @directrix, I got this same error and contacted their support team. Then advised me that this is a Google issue as they have made changes recently. But if you have an existing task that is connected to Google Drive, it'll work perfectly. Fret not, Caspio DevOps team is now looking for a way to make this work. *winks*4 points -
 I thought this might be helpful across the board for people developing in Caspio. I've been trying to do a better UI for data entry on web pages that also have to show results in a tabular report. Since iframes don't reliably pass parameters from parent to child and back it's necessary to sometimes deploy 2 datapages (a Submit or Details and a Tabular) on the same web page. This doesn't really look good from a UI perspective. This solution requires using bootstrap and jquery but it's fairly straightforward. One option is to put the the Submit/Details deploy code in the first div with something like class="col-md-3" and the Tabular deploy code in the next div with class="col-md-9" (divs in bootstrap with col classes must add up to 12 but no more than 12, in basic mode). This will put the 2 datapages next to each other, the 1st with 1/4 screen width and the 2nd with 3/4th. However, this setup looks cluttered and can constrain the Tabular report which often needs full page width to show its data clearly. So the ideal would be to onload hide/collapse the first div (with the Submit/Details form) and have the second div (tabular report) a full 12 columns wide. Then click a button or link to show the 1st div (Submit form) and change the 2nd div (tabular report) to 9 columns, thereby displaying both datapages when data entry/edit is needed. Clicking the button/link again (in this method) will collapse div1 and expand div2 back to 12 columns. So it's easy to toggle views this way. To do this: Put this in the body of your webpage (you may have bootstrap and jquery referenced differently): <div class="container-fluid"> <br> <div class="row"> <div class="col-md-3 bg-faded"> <div id="showsubmitform" class="collapse"> Caspio Deploy Code for Submit/Details form </div> </div> <div class="col-md-12" id="right"> <div> Caspio Deploy Code for Tabular Report </div> </div> </div> </div> <script src="//ajax.googleapis.com/ajax/libs/jquery/2.2.4/jquery.min.js"></script> <script src="//maxcdn.bootstrapcdn.com/bootstrap/3.3.7/js/bootstrap.min.js"></script> <script> $('#btnSwitch').click(function(){ $('.col-md-3').toggleClass('show'); $('#right').toggleClass('col-md-9 col-md-12'); }) </script> And then put a button or link elsewhere on your page, wherever you want to show it: <a class="btn page-action" id="btnSwitch" href="#showsubmitform" style="color:green;" data-toggle="collapse"><i class="fa fa-plus" aria-hidden="true"></i> Submit New Data</a> When the page is loaded the Tabular Report will be the only datapage showing, in full width. When the 'Submit New Data' link is clicked the Tabular Report moves to the right and shrinks to 9 columns from 12. The space that opens on the left is 3 columns wide and will now show the Submit/Details form. When the 'Submit New Data' link is clicked again it will hide the Submit/Details form and expand the Tabular Report back to 12 full columns. You can change the column numbers of the divs and button ids and labels to suit. This solution might help with some UI massaging, if anyone is working on that aspect of their app...4 points
 -

Timestamp When "y" Clicked
wayanmariasa and 3 others reacted to kme for a topic
MayMusic - Thanks so much, it is working now. For those interested in the solution, The additional problem was that Timestamp field in the Table had to have a datatype of Text(255). In the Details Page, Timestamp was changed to a Text Field. Once Yes was clicked, the textfield was filled with a timestamp, and then when Update was clicked, the field in the Results Page was filled with the timestamp. Thanks again.4 points -
JS: Prevent blank entries from displaying in a dropdown
Andrewmync and 3 others reacted to caspio for a topic
JavaScript Solution: Prevent blank entries from displaying in a dropdown form element Feature Description: This JavaScript solution shows how to prevent blank "Text" entries from displaying in a dropdown form element of a Search form in a Search and Report DataPage. Typically, when a dropdown form element is configured in Caspio Bridge to use a Lookup table/view, a lookup table and field are selected. The selected field may be populated by a user through another DataPage such as a WebForm. For example, assume that a user is expected to fill in the value for a City field in a WebForm DataPage. This City field is also used as a Lookup table/view field to populate a dropdown form element in the Search page of a Search and Report DataPage. If a user omits to fill a value for the City field in the WebForm, then no value is stored for that record. This, in turn, causes the dropdown form element on the Search page to display a blank. This JavaScript solution, when applied on a Search page of a Search and Report DataPage, will remove the appearance of all blank entries. This improves the appearance of the Search page, while still preserving all values other than a blank in the dropdown form element. Implementation: This solution can be used "as-is", without any changes if It is used in the Search form of a Search and Report DataPage and The dropdown form element is the first field of the search page, To use this solution, a. Highlight to copy the code provided in the text area shown below. b. Paste it inside the HTML Footer section of the Search form in a Search and Report DataPage. The Dropdown Form Element considered for this example is referenced as Value1_1 in the script provided below. Value1_1 stands for the first form element. Hence, for a Dropdown Form Element appearing in positions other than the first position, this solution can be customized by changing the value of the variable dropdown. <SCRIPT LANGUAGE="JavaScript"> <!-- Function removeBlanksInDropdown searches for blank entries and removes all occurrences. It is advisable to use this script with the "Show distinct display options" checkbox checked in the dropdown configuration in the Caspio Bridge DataPage Wizard --> function removeBlanksInDropdown() { /* dropdown stores the value of the dropdown form element reference in the DataPage. */ var dropdown = document.getElementsByName("Value1_1"); for (var q = dropdown[0].length-1; q >= 0; q--) { if (dropdown[0].options[q].value == "") dropdown[0].remove(q); } } document.addEventListener('DataPageReady', removeBlanksInDropdown); </SCRIPT> Customize the script by changing the value of the variable dropdown to an appropriate field reference. For example, if the Dropdown appears as the second field of the Search form, it must be referenced as Value2_1. Accordingly, change the above code from var dropdown = document.getElementsByName("Value1_1"); to var dropdown = document.getElementsByName("Value2_1"); Additional Considerations This solution only removes the "appearance" of blank entries from the City field used in the Search form. It does not remove the blank entries from the associated table. Tested Browsers This JavaScript solution was tested on the following platforms and Internet Browsers only. # MS Windows - IE 8.0, Firefox 3.5.7, Chrome 3.0.195.38, Safari 4.0.3 # Macintosh - Firefox 3.5.7, Safari 4.0.3 Disclaimer: Use these JavaScript solutions at your own risk! They are provided to assist you in the customization of your programs and while we believe they work properly, by using them you accept all responsibility about them and confirm that they are not a feature of Caspio's platforms and as such are provided "as is" without any warranties, support or guarantees.4 points -
JavaScript Solution: Disable fields conditionally in the search page Feature Description: This JavaScript solution shows how to disable a Dropdown Form Element based on a selection made in another dropdown element. This solution can be used on the Search page of a Search and Report DataPage. For example, assume that a search form contains three fields, Country, State and City where Country and State are Dropdown form elements and City is a Text Field. If the country selected in the Country dropdown is not "United States", the State dropdown element is disabled. This prevents a user from making a selection for State. This feature is useful when there are no State values to be displayed for any Country selection other than the United States. Implementation: This solution can be used "as-is", without any changes if It is used in the Search page of a Search and Report DataPage, The first and second field elements are Dropdown Form Elements and, The selection made in the first dropdown is "United States". To use this solution, a. Highlight to copy the code provided in the text area shown below. b. Paste it inside the HTML Footer section of the Search page in the Search and Report using the Caspio Bridge DataPage Wizard. Form elements on the Search page of a Search and Report DataPage are referenced as Value1_1, Value2_1 and so on. Value1_1 is a reference to the first form element while Value2_1 is a reference to the second form element. The naming convention follows the order in which the form elements appear on a DataPage. This solution can be customized for two elements of a Search form appearing in any order as long as the first of the two elements is a Dropdown Form Element. <SCRIPT LANGUAGE="JavaScript"> /*(1) Value1_1 is a reference to the first dropdown element */ var dropdown1 = "Value1_1"; /*(2) Value2_1 is a reference to the second drodown element */ var dropdown2 = "Value2_1"; /*(3) The text in the first dropdown which if not selected will disable the second dropdown */ var rightSelection = "United States"; <!-- Function secondDropdown compares the selection made in one dropdown and disables another dropdown based on selections made --> function secondDropdown() { var firstDropdown = document.getElementsByName(dropdown1); var firstSelection = firstDropdown[0].options[firstDropdown[0].selectedIndex].text; var secondDropdown = document.getElementsByName(dropdown2); if (firstSelection != rightSelection) secondDropdown[0].disabled=true; else secondDropdown[0].disabled=false; } document.addEventListener('DataPageReady', secondDropdown); /*(4) Everytime a selection is made, the function secondDropdown() is called. */ document.getElementById("caspioform").Value1_1.onchange=secondDropdown; </SCRIPT> Tips for Customization a. Customize the script by changing the values of the variables dropdown1 and dropdown2 to their appropriate field references. b. Change the value of the variable right selection from "United States" to suit your requirements. c. Change the direct reference made to the first Dropdown Form Element in the line of code directly below comment (4) to the appropriate reference For example, if the Country field is the fifth field on the Search form, a reference to it is made as Value5_1. This requires a change to the line of code below comment (4) as shown. document.getElementById("Value5_1 ").onchange=secondDropdown; Additional Considerations The use of this solution may conflict with other solutions that you may have already used for a particular DataPage. Tested Browsers This JavaScript solution was tested on the following platforms and Internet Browsers only. # MS Windows - IE 8.0, Firefox 3.5.7, Chrome 3.0.195.38, Safari 4.0.3 # Macintosh - Firefox 3.5.7, Safari 4.0.3 Disclaimer: Use these JavaScript solutions at your own risk! They are provided to assist you in the customization of your programs and while we believe they work properly, by using them you accept all responsibility about them and confirm that they are not a feature of Caspio's platforms and as such are provided "as is" without any warranties, support or guarantees.4 points
-

Directory Activation Email DNS
oliverk and 2 others reacted to CoopperBackpack for a question
Hi @ccxc007, I checked this with the support team a while ago and the answer was that this option will be added in future releases. Hopefully, it will be added in the next release. We`ll see3 points -

Conditionally Disable View Details record action
DemoC and 2 others reacted to Volomeister for a topic
Hi @bookish You can do it without JavaScript 1. Use the calculated field to return a link you need as an HTML string. For example: CASE WHEN [@field:Name]= "Test1" THEN '<a href="detailsLink?parametername='+ [@field:RandomID]+ '">Details page </a>' ELSE '' END 2. Add this calculated field as HTML to HTML block: 3. Place the calculated field in 1st position and add the following CSS in the header of your DataPage: <style> dt:nth-child(1), dd:nth-child(2) { display: none; } </style> Hope it helps
 3 points
 -

Apply CSS for Nth Child to Nth Child
autonumber and 2 others reacted to futurist for a topic
For instances wherein you need to apply CSS to multiple sibling elements at the same time, for example hiding the 8th to 11th column in a Tabular Report DataPage, what we would normally do is to refer to each of those elements individually, like so: <style> form[action*='[@cbAppKey]'] tr.cbResultSetDataRow td:nth-child(8), form[action*='[@cbAppKey]'] tr.cbResultSetTableHeader th:nth-child(8), form[action*='[@cbAppKey]'] tr.cbResultSetDataRow td:nth-child(9), form[action*='[@cbAppKey]'] tr.cbResultSetTableHeader th:nth-child(9), form[action*='[@cbAppKey]'] tr.cbResultSetDataRow td:nth-child(10), form[action*='[@cbAppKey]'] tr.cbResultSetTableHeader th:nth-child(10), form[action*='[@cbAppKey]'] tr.cbResultSetDataRow td:nth-child(11), form[action*='[@cbAppKey]'] tr.cbResultSetTableHeader th:nth-child(11) { display:none !important; } This approach works, but this would be lengthy, especially if there are more sibling elements you have to include in the CSS. This can actually be shortened, wherein you would only have to specify the range of siblings that are going to be included. Using the above example, it could be further shortened to this: form[action*='[@cbAppKey]'] tr.cbResultSetDataRow td:nth-child(n+8):nth-child(-n+11), form[action*='[@cbAppKey]'] tr.cbResultSetTableHeader th:nth-child(n+8):nth-child(-n+11) { display:none !important; } Wherein the "8" represents the starting point, and the "11" is the ending point. So everything within this range (8th to 11th sibling) would be included, and the rest are not.3 points -

Solution - View of IDs Based on 2 Fields
biota and 2 others reacted to ChristianM for a question
Thought this might help anyone struggling as I did to create a View of only IDs (1) not duplicated between two tables or (2) duplicated between two tables but a second field is a certain value. I have two tables: 1. Table A - has a list of every available ID 2. Table B - contains IDs of inserted records (can have same ID on multiple records) I did a full outer join on the two tables in a View based on the ID First criteria only show IDs that are in Table A but not in Table B I then only want to include IDs if the record is in Table A and Table B, but a second field has a value of "Yes". However, Table B can have multiple records with the same ID with the second field with values of "Yes" or "No". The Not Equal filter wouldn't work because you can't NOT at the AND level. To solve this I added a sub-AND filter with two lines stipulating what I wanted the field to be and what I wanted it not to be.

 3 points
 -

Hide/Show Update button when certain condition is met
KG360 and 2 others reacted to BaySunshine for a topic
Hi @beryllium, A standard way of achieving this without using JavaScript is below: Add a Header/Footer to your page. Enter following code to hide the existing Update button: <style> .cbUpdateButton { display: none !important; } </style> Add a new section and in it add an HTML Block. Enter following code to add a custom Update button: <div id="update" align="center"> <input type="submit" class="cbSubmitButton" value="Update" /> </div> Now add a Rule. It should look like below: Replace "Value" with your field name. I hope this helps. Regards,
 3 points
 -
Since it appears nobody has done this before and support from Caspio isn't willing to make their documentation clear enough to figure this out, I spent many hours in trial and error to figure out how the API works and to do so with PHP...which everyone on the web should know. Below is the code sample that when called through a URL with query values will: 1) attempt to get a file which will store the auth token in a function 2) if there is no file, get a new auth token and then store it in a bearer file in a function 3) attempt to write the value to the field in the table 4) if unsuccessful, try renewing the token, store the new token, and write to the table again. This should hopefully live forever and never need me to go and renew the tokens, which is a pain and prone to messing up the program someday. This is what I was looking for all over the forums. Hopefully this will help someone someday: <?php $bearer_filename="bearer.php"; //file to hold function which responds to request for current auth token $sub_domain="c1eib....";//replace with the subdomain Caspio assigns to your url for token auth $client_id='e16e1a....replace with your client id 51ade07'; $client_secret='e235b22....replace with your secret.......d4b3d9c1e6d8a5'; function getBearer(){ global $sub_domain; global $client_id; global $client_secret; $body="grant_type=client_credentials&client_id=".$client_id."&client_secret=".$client_secret; $grant_type='grant_type=client_credentials'; $auth_url='https://'.$sub_domain.'.caspio.com/oauth/token'; $curl = curl_init(); curl_setopt($curl, CURLOPT_URL, $auth_url); curl_setopt($curl, CURLOPT_POST, 1); curl_setopt($curl, CURLOPT_POSTFIELDS, $body); curl_setopt($curl, CURLOPT_RETURNTRANSFER, true); $result = curl_exec($curl); if(!$result){return "Connection Failure";} curl_close($curl); return $result; } function updateTable($table,$id,$matching,$field,$value,$auth){ global $sub_domain; $auth=json_decode($auth); $url = 'https://'.$sub_domain.'.caspio.com/rest/v2/tables/'.$table.'/records?q.where='.$id.'%3D'.$matching; $update=array($field => $value); $postdata=json_encode($update); $auth = 'bearer '.$auth->access_token; $curl = curl_init(); curl_setopt_array($curl, array( CURLOPT_URL => $url, CURLOPT_RETURNTRANSFER => true, CURLOPT_ENCODING => "", CURLOPT_MAXREDIRS => 10, CURLOPT_TIMEOUT => 30, CURLOPT_HTTP_VERSION => CURL_HTTP_VERSION_1_1, CURLOPT_CUSTOMREQUEST => "PUT", CURLOPT_POSTFIELDS => $postdata, CURLOPT_HTTPHEADER => array( "Authorization:" . $auth, "accept: application/json", "cache-control: no-cache", "content-type: application/json", 'Content-Length: ' . strlen($postdata) ) )); $results=curl_exec($curl); curl_close($curl); echo $results; $response=json_decode($results); if($response->RecordsAffected==1){ echo "<br>Updated 1 row successfully"; }else{ //get the auth key and try again } return $response; } function createBearer(){ global $bearer_filename; $new_auth = getBearer(); //get new bearer tokens $code='<'.'?php function getAuth(){return \''.$new_auth.'\';} ?'.'>'; //code for file with function to return values file_put_contents($bearer_filename,$code); return $new_auth; } if(!file_exists($bearer_filename)){ //create new bearer file and get auth $auth = createBearer(); }else{ //file exists with function to give auth include $bearer_filename; $auth = getAuth(); } //get values from URL for posting to table $table=$_GET["Table"]; $id=$_GET["ID"]; $matching=$_GET["Matching"]; $field=$_GET["Field"]; $value=$_GET["Value"]; $results = updateTable($table,$id,$matching,$field,$value,$auth); if($results->Message=="Authorization has been denied for this request."){ echo "<br>Problem with update. Try getting new bearer and try again"; $auth = createBearer(); //could be that the token has expired. create new one, save the file and try again with fresh token $results = updateTable($table,$id,$matching,$field,$value,$auth); echo "Results after retry:".$results; } ?> Wherever you place this on your server, you can call it directly using: https://...your url to this php file...?Table=YOUR_TABLE&ID=FIELD_NAME_IN_TABLE_FOR_MATCHING_ID&Matching=VALUE_TO_MATCH_ID&Field=FIELD_YOU_WANT_TO_UPDATE&Value=VALUE_YOU_WANT_IN_THE_FIELD This was design for a single field update in a single row. You will need to adapt for any other use, but at least I will hopefully never have to worry about an auth token ever again and my program will be stable.3 points
-
Hello @DDLiving, You may refer to this screenshot to achieve that.
 3 points
 -
Not sure if what I understood is correct, but, you can try this, create a Calculated Value, this is to check if the date today is less than 5 or not. If it's 1, user can input any date, if it's 0, only on the current month and later. CASE WHEN DATEPART(day, GetUTCDate()) <5 OR (DATEPART(day, GetUTCDate()) >= 5 AND DATEPART(month,GetUTCDate()) <= DATEPART(month, [@field:Date])) THEN 1 ELSE 0 END Script on the footer: (change the number on cbParamVirtual1 depending in your Virtual Field) <script> document.addEventListener("BeforeFormSubmit", function(e){ var a= document.querySelector("input[name='cbParamVirtual1']").value; if (a == 0){ e.preventDefault(); alert("Please input Date within or after the current month"); } }); </script> If you want this to trigger on change of the field that is being used in the Calculated Field. Change the InsertRecordFIELDNAME to your actual field's id cbParamVirtual1 to your Virtual Field's name if it's 1 2 3 or whatevers <script> document.getElementById("InsertRecordFIELDNAME").addEventListener("change", function(e){ document.querySelector("input[name='cbParamVirtual1']").addEventListener("change", function checker(){ var a= document.querySelector("input[name='cbParamVirtual1']").value; if (a == 0){ //if Calculated Value is 0 then alert alert("Please input Date within or after the current month"); //add another code } this.removeEventListener("change",checker); }); }); </script>3 points
-

Using Table Variables in Triggered Actions
Lepidoptera and 2 others reacted to NiceDuck for a question
An Agent from Chat support gave me this doc. Its not official but I hope it helps quack: Table Variables .pdf3 points -

How Can I Format A Text Field As A Dollar?
JMR21 and 2 others reacted to Vitalikssssss for a topic
Hi @bbewley, @kpcollier, You may try using this JS which should go to the Footer: <script type="text/javascript"> function formatAsDollars(el) { el.value = el.value.replace(/[^\d]/g,'').replace(/(\d\d?)$/,'$1').replace(/^0+/,'').replace( /\d{1,3}(?=(\d{3})+(?!\d))/g , "$&,"); el.value = el.value ? '$' + el.value : ''; } let fields = ["FIELD_1", "FIELD_2"]; //specify your fields here fields.forEach(element => { element = "InsertRecord" + element; // replace "InsertRecord" with "EditRecord" for Details/Single Record Update DP document.getElementById(element).onkeyup = function() { formatAsDollars(this); } document.getElementById(element).onchange= function() { formatAsDollars(this); } }); </script> Pay attention to comments. Hope this helps. Vitalikssssss3 points -

Set Date to Null or Empty
KwentenB and 2 others reacted to AtayBalunbalunan for a question
One solution to this is using a Calculated Value as the form element with this formula: CAST(null as datetime) If you wish to hide this field, you may use HTML Blocks: https://howto.caspio.com/tech-tips-and-articles/common-customizations/how-to-hide-fields-in-datapages/3 points -
Hello I want to share something with you guys again. Back then when I only have an 'explore plan', I'm using this workflow to send acknowledgement/notification emails on different persons base on a value of a field in my submission form. My workflow back then is I have a submission form for job applicants. I want to send an email to a certain member of my company depending on which position the applicant is app laying. for example. If the applicant is applying for a staff position, there will be an email an email send to staff manager, If the applicant is applying for an agent position, there will be an email an email send to agent manager. etc... This could easily be done via trigger but since it was unavailable on explore plans. This is what I did. First I made a lookup table containing the emails of the designated managers where I used the job they are managing as a unique field. Then on my submission form. I made a virutal field and set it as a cascading dropdown that is using the field for the position the user is applying for as a parent field and used the table containing the emails of the managers as a lookup table. I enveloped this virtual field with html blocks with html codes for hiding fields. please see this documentation for reference : https://howto.caspio.com/tech-tips-and-articles/common-customizations/how-to-hide-fields-in-datapages/ and https://howto.caspio.com/datapages/datapage-components/cascading-elements/ . Now that it was hidden, we will now proceed to the messaging options. It is up to you to chose if you want an Notification emails or Acknowledgement emails. As I check It works with any of them as long as you are going to use the virtual field with cascading value as the field reference for email. It will now send an email on different person depending on what job the user is applying to. I hope it helps anyone. Also please comment if you have a better idea. Quack3 points
-
listbox choice appear in a text area
directrix and 2 others reacted to LunaLovegood for a question
Hello @Medron, You can try this code: — Luna — 3 points
 -

Dates Exported To Excel Are Not In Date Format
Smoormumouh and 2 others reacted to BjornSkifs for a question
Hi! I am exporting a view to excel. When I try to perform the operation year(a2) on a date, then I get an error saying that the cell contains text and not a date. I.e. it seems that a date i Caspio is not exported as a date to excel. Regards Bjorn3 points -

Only display records older than specified time
ChristianM and 2 others reacted to Ariel for a question
Hi Adam, You could add a new field "Date_filter" of Formula data type to your table and use the following function: Dateadd(hour,24,[@field:timestamp]) Replace [@field:timestamp] with the name of your field that holds date/time of original submission. In the pre-defined criteria report, on Select Filtering Fields screen, move "Date_filter" to Selected Fields area. On the Configure Filtering Fields screen click on the "Date_filter" field and choose "Before Now" as comparison type. Hope this helps. Ariel3 points -
Instead of the date field add an HTML Block to the Configure Results Page Fields screen and use this code: <script> if (Date.parse('[@field:DateFieldName*]') > Date.parse('[@cbTimeStamp*]')) { document.write("<div style='color:red;'>[@field:DateFieldName]</div>"); } else { document.write("[@field:DateFieldName]"); } </script> Make sure you have enabled parameters and select [@field:DateFieldName] from the picker3 points


.thumb.jpg.03878e50b4d1236f6c1e432d00fe2a55.jpg)


